You are checking your email metrics and something looks wrong. Delivery rates have dropped significantly. You are getting NDRs (non-delivery reports) that you have never seen before. Contacts are telling you they simply are not receiving your emails. You run a check on your domain or IP and you find it: you are on a blacklist.
Being blacklisted is one of the most alarming deliverability events a sender can experience, and it is also one of the most commonly misunderstood. The situation feels urgent and serious — because it is — but it is almost always fixable if you approach it correctly. In this guide we walk you through every step of the process, from identifying which blacklist you are on and why, to getting delisted and making sure it does not happen again.
An email blacklist (also called a blocklist) is a database of IP addresses and domains that have been identified as sources of spam, phishing, or other abusive email. Major inbox providers like Gmail, Outlook, and Yahoo check incoming emails against multiple blacklists as part of their spam filtering process. If your sending IP or domain appears on a blacklist that your recipients' email providers trust, your emails will be blocked, deferred, or filtered to spam for everyone using those providers.
There are dozens of blacklists in operation, but only a handful have significant impact on major inbox providers. Spamhaus (specifically the SBL, XBL, and ZEN lists) is the most impactful and the most widely referenced by inbox providers. Barracuda, SORBS, SpamCop, Invaluement, and Senderscore (Validity) are others that affect deliverability across various providers and email security gateways.
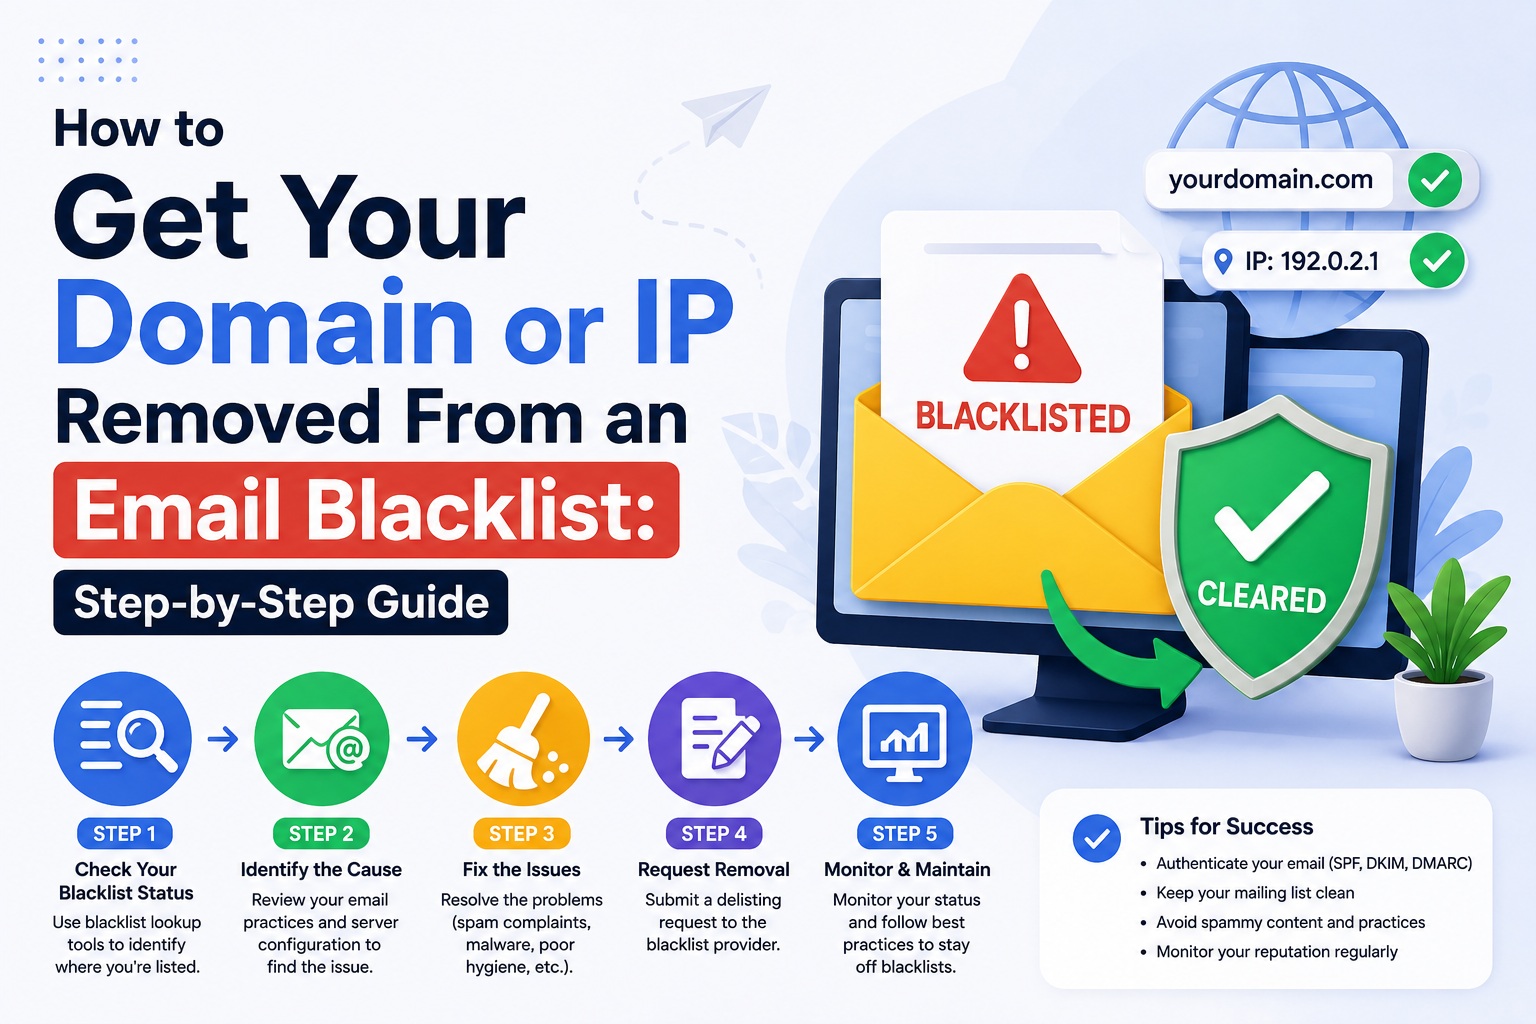
The first thing you need to know is which blacklist or blacklists you appear on, and whether it is your IP address, your domain, or both. Do not guess. Use tools designed for this purpose.
MXToolbox Blacklist Check (mxtoolbox.com/blacklists.aspx) is the most comprehensive free tool for this. Enter your domain or sending IP and it checks against more than 100 blacklists simultaneously, showing you which ones have listed you and providing direct links to the listing details. Run this check for every IP address your emails are sent from, and for your primary sending domain.
Google Postmaster Tools and Microsoft SNDS will also show you reputation warnings specific to those providers. These are separate from blacklist databases but equally important for understanding the full scope of your deliverability problem.
Every blacklist listing has a reason. Before you submit a delisting request, you absolutely must identify and fix the root cause — otherwise you will be relisted within days or weeks of getting removed, and repeated listings make future delistings much harder to obtain.
Common causes include a sudden spike in spam complaints from recipients hitting the report spam button on your emails, hitting spam traps (email addresses set up specifically to catch poor list hygiene), sending to purchased or scraped email lists, a compromised domain or mail server being used to send spam without your knowledge, or misconfigured authentication records that made your emails look like spoofing attempts. Our guide on email blacklist remediation covers how to diagnose each of these root causes specifically.
This step cannot be skipped or abbreviated. Submitting a delisting request before fixing the underlying problem is a waste of time and will damage your credibility with the blacklist operator. Different root causes require different fixes.
If high complaint rates caused the listing: clean your list aggressively, remove all unengaged contacts, review your subscription practices to ensure you are only emailing opted-in contacts, and implement a clear suppression process for anyone who complains. If spam traps caused the listing: clean your list thoroughly, remove all contacts acquired through purchase or scraping, and implement double opt-in for new subscribers. If your infrastructure was compromised: patch the vulnerability, reset all credentials, and verify that no unauthorized sending is occurring from your domain.
Document the fixes you made. Blacklist operators will ask what caused the listing and what you did to resolve it, and a clear, specific answer significantly improves your delisting success rate.
Once the root cause is completely resolved, go to the specific blacklist operator's delisting request page. Every major blacklist has its own process, and the details matter.
For Spamhaus: go to check.spamhaus.org, find your specific listing, and follow their removal process. Spamhaus has different procedures for SBL listings (manually reviewed) versus XBL listings (automatic removal once the underlying cause is resolved). Read their instructions carefully.
For Barracuda: the removal request is submitted at barracudacentral.org/rbl/removal-request and typically processes within 24 hours once submitted.
For most other blacklists: MXToolbox provides direct links to the removal request page for each blacklist in its results. Use these links — they go directly to the right place.
Be honest and specific in your removal request. Explain what caused the listing, what you have done to fix it, and what processes you have put in place to prevent recurrence. Vague requests get denied or ignored. Specific, honest explanations get approved.
Getting delisted is not the end of the process — it is the beginning of your reputation recovery. After you are removed from a blacklist, your sender reputation with inbox providers does not instantly return to normal. They remember that you were listed and will monitor your subsequent sending behavior closely.
For the 30 to 60 days following delisting, send only to your most engaged subscribers, keep volume low, monitor your reputation metrics daily, and treat every complaint or bounce with maximum seriousness. Gradually scale back up as your metrics demonstrate sustained positive behavior. Our email deliverability support and monitoring service provides exactly this kind of close monitoring during post-delisting recovery.
Getting delisted from a blacklist is possible and usually achievable within days for most blacklists. Staying off the blacklist requires fixing what put you there in the first place. One without the other is just a temporary solution.
If you have been blacklisted and need help navigating the delisting process and root cause analysis, Formula Inbox's team has handled dozens of blacklist remediation cases. We identify the cause, execute the fix, submit the delisting requests, and monitor your recovery. You can also start with a full email deliverability audit to understand the complete scope of your deliverability situation.

Microsoft's 2026 Outlook spam filtering changes are blocking more legitimate emails than ever. Learn what changed, why your emails are going to Outlook junk, an

Gmail's Gemini AI now summarizes, filters and prioritizes emails before humans see them. Learn how this changes deliverability rules and what you must do to sta

Email deliverability is whether your emails reach the inbox or end up in spam. This complete guide covers everything you need to know to understand and improve
Our highly experienced email deliverability managers consistently help clients achieve inbox placement rates (IPR) of more than 90% by uncovering and resolving the issues that keep messages from their intended recipients. Are you ready to do the same?